Showing posts with label #iOSAdvice. Show all posts

Wednesday, May 14, 2014

How to find your lost iPhone.

(This story is told through the eyes and words of an iPhone)

The memories are foggy as to how my owner lost me, but that's not really what's important here.  What is important is that she found me, thanks to a really knowledgeable and awesome dude (The MacMentor), and a really smart mom (who kept her Apple ID and Password safe).

So here's what I remember...I was having a blast with my owner, down at the beach.  She was living it up, tanning and having fun with her friends, it was a great day!  A few hours go by, the sun started to set, and the next thing I know, she's gone!  Left without me.  I was so sad!  I didn't know what to do, so I waited, and waited and waited.  Thankfully I had a full battery charge.  My only hope was that my owner (who asked to remain anonymous here) remembered her Apple ID, and password.

So here's what happened next (I know because she told me).  My owner was so nervous that her mom was going to go berserk, but thankfully she has a Mac Guy who could help her, his name is The MacMentor (aka, Geoff Horwitz).  She called The MacMentor and told him of her terrible situation and asked him what to do.  The MacMentor asked her if she knew her Apple ID.  She gave him the ID she thought she used, and The MacMentor went to his trusty Mac, opened up Safari and proceeded to go to http://icloud.com.


Once there, he entered the Apple ID and Password my owner gave him (hidden for obvious reasons).  Sadly, he got a message back from iCloud that the Apple ID and password had not been set up!  The MacMentor shook his head in disbelief.  If iCloud had not been set up, how on earth would I (the iPhone) be found?  The MacMentor was sure that my owner had set up her iCloud, so he had her call her mom.  What happened next was just plain awesome!  Thankfully mom had written down the Apple ID and password my owner used for iCloud.  So, mom opened up Safari, went to iCloud.com and signed in with my owners Apple ID and password.


When mom did that she came to the screen capture above.  Next, mom pressed the Find my iPhone button which took her to a map, similar to the one below, but for security reasons, the map below is simply being used as an example.


It's a little hard to see, but on the top right of the screen capture above, there's a window with me, the iPhone, and underneath three buttons.  Play Sound, Lost Mode and Erase iPhone.  Mom was able to locate the iPhone on the beach where my owner had forgotten me, but it was dark out, and it would be really hard to find me!  So, mom called The MacMentor, and he told her to press the Play Sound button (I tell you, that MacMentor dude is a genius!).  This story keeps getting better!  You see, thankfully my battery still had plenty of charge, and I was still on.  So when mom pressed the Play Sound button on iCloud I started making a loud sonar noise.  And low and behold, a few minutes later, even though it was dark, my owner and her friends heard me calling her and she came and got me!  Yeah!  I love stories with a happy ending, and thanks to the wonderful MacMentor, and a resourceful mom,  I didn't get washed up in the tide and lost at sea!

So the moral of the story is this.  If you own an iPhone, make sure you sign in to iCloud, and make sure you remember your Apple ID and password!  And it would help if you knew The MacMentor as well...:).

Thanks for reading, and don't forget to keep your iPhone and iPad safe, using iCloud!


Thursday, March 13, 2014

Using Skype, Viber, KaKao and Factime.

Spring is almost here...and it couldn't come soon enough!  With spring comes spring break!  Perhaps you or your kids are traveling to other countries this spring (or summer) and you want to keep up with the folks back home.  You have a number of options.  First, if you are communicating to another iOS device you can simply use the Messages App or FaceTime to communicate.  If you are communicating between device platforms (iPhone to Android, or iPhone to PC), then you'll need an App like Skype, Viber or KaKao Talk.  


The Skype platform has been around the longest.  It's a great tool that allows you to communicate with others using Skype across platforms.  You can Skype with someone from a PC to a Mac, or an Android to a PC, or a Mac to an Android.  You get the picture.   It also works on the iPhone and iPad.    Skyping is free, so long as you are connected to a wireless network.  If you try and Skype from an iPhone in Mexico to an iPhone in Beijing, and neither of you are connected to wireless, your data charges from your carrier may not bankrupt you but they will be costly!  So make certain that you are connected to a wireless network, so when you Skype with someone, anyone, anywhere in the world, its FREE!  Now Skype also let's you call land lines anywhere in the world.  There are charges for that, and I recommend you visit Skype.com to make yourself aware of those charges.  

Ok, moving on.  The next App I'm going to discuss is Viber.  


Viber is a popular app with the younger crowd (teens and 20-somethings).  Viber provides basically the same service as Skype.  It's a cross-platform communication app (tool).  It let's you communicate to other Viber users for free, IF you are on connected to a wireless network.  If you are using your 3G or LTE connection, you WILL have data charges for using Viber.  Again is you are going out of the country, PLEASE make sure prior to using Viber that you have connected to a wireless network.  Otherwise your data charge(s) will be considerable, and your parents will get upset with you!    

KaKao Talk is another in a line of communication Apps, offering the similar services as Viber and Skype.  For the younger crowd it has some cool emojis that you can use.


All of these Apps are great tools to communicate across platform.  If you are communicating within Platform (Apple), I highly recommend using the Apple tools:  iMessage (Message App on your iPhone/iPad) and FaceTime.  iMessage offers end to end encryption for messaging, and FaceTime offers crystal clear video and now audio.  iMessage and FaceTime CAN be FREE (between countries), if you are in a wireless network.  They are ALWAYS free within the United States (wireless or data).  

Real life story...Last summer my daughter was in Israel.  While on a Kibbutz (and connected to their wireless network) she FaceTimed me (many times).  You know how much it cost me?  ZERO.  How awesome is that!! A video call, between countries for more than 20 minutes, for FREE!!  Because she listened to dad, turned her cellular off and connected to wi-fi...good kid!

So parents you have some good options to communicate with your kids while they are out of the country this spring break (and anytime for that matter), you just need to make them aware of shortcomings (not using wireless).  

Enjoy the warm weather, enjoy spring break, keep the kids (and yourself) on wi-fi while out of the country!

Until next time, best to you and your devices!


Wednesday, February 19, 2014

Merging contacts on your iPhone and iPad.


Do you a contact problem on your iOS device?  Do your duplicates stress you out??   It’s practically inevitable that duplicate contacts appears on your iOS device either by accident, typos, through sharing vCard information with others, or from something as basic as a contact changing their name and addresses, for which an additional entry gets added. Prior to iOS 7, there was no simple way of handling multiple contact entries on your iOS device, but that has finally changed, and now there is an easy way to merge those contacts directly and easily!  


Ok, this will be fantastic for those of you that experience DCS!  Because this is done on your iOS device, you do not need to to sync to iCloud, iTunes  or any other computer for the change to take effect, you simply make the change directly on your iOS device, and iCloud, takes care of pushing the changes automatically to any other iOS and OS X devices that use the same Apple ID.


I've got screen captures just below to assist.

This fantastic new feature is not actually called Merge, but rather Link Contacts, which is possibly why it’s  often missed, or overlooked, regardless, here is what you do!

  1. From your iOS device, tap the Contacts app (or on your iPhone, tap the phone app) , open the contact you wish to merge another duplicate contacts with.  
  2. Next, tap on the “Edit” button
  3. Scroll down toward the bottom to find Link Contacts, then tap on the green plus icon “(+) link contacts…” to link/merge the contact with another.
  4. Then, locate the contact to merge (either a duplicate or a changed addressee) and tap on the name, then tap on “Link” in the corner
  5. Repeat for more than one duplicate, otherwise tap on “Done” to finish the merging
Yeah!!  This instantly links/merges all contact details from the two (or more) contact cards into a single contact entry, it does not overwrite any information, it simply merges all details into a single contact.
In the screenshots below, the address information for multiple AT&T contacts has been merged into a single card. The first contact edited will be the one that accepts the merged details:


Once you click “Done”, there will only be a single contact for the details you merged (linked), in this example I've Merged/Linked two AT&T accounts.
One great thing about the “Link Contacts” method is that although it merges the contacts,  it can very easily be  undone if you decide to unmerge/unlink the contact details. To do that, just go back to the contact in question, tap on “Edit” and then tap on the red (-) icon along the linked contacts details.
There are other ways to Merge/Link contacts,  but I'm not going to address those here.  Today I simply wanted to point out a great feature that was added to iOS 7.  
So now it's up to you!  If you are loaded with duplicate contacts, you've been given the green light to get rid of them!  It may take some time, but will definitely be worth it.  Free you device of DCS!
Until next time, best to you and your fewer contacts...:).

Sunday, February 2, 2014

Great Apps for your iPhone and iPad

Happy February!  Those of you that have "Liked" The MacMentor on Facebook have had the benefit of viewing my App and Device of the Week posts that I started this past January.  The goal of the weekly postings is to make you all more aware of the great tools available to you for your iPhones and iPads.

The first App of the week, is one that I recently started using.  It's called Scanner Pro.


If you were able to view my posting in early January, and you went to download ScannerPro, it was the AppStore's App of the Week, first week of January, and it was FREE!  If you missed it, it is still 50% off, but that ends Feb 4th, so hurry!  Scanner Pro is a great app that allows you to quickly and easily scan paper documents and save them into PDF format.


Once the device has been scanned, it can be easily uploaded to Evernote, Google Drive.  For those of you that use iCloud, the document can be uploaded there as well!  It can also be emailed.


It's a great tool for those of you looking for a quick efficient way to get your documents onto your iOS device, then either uploaded to your cloud drive(s) or emailed.

Week two of January brought us another great app, this one is however limited to those of you that own Mac's, as it works in conjunction between your iOS device and your Mac computer.  It's called Command-C.  Those of you familiar with Mac shortcuts, know exactly what Command-C does, it copies something into the Mac memory.   


Command-C is downloaded to both your Mac and iOS device, on your Mac, it sits on the Menu bar (see pic below).  When you capture something using Command-C, you can easily copy it to your iOS device!  Very, very cool!  


It's a super quick, and easy way to copy notes or other text between your devices.

Week 3 of January 2014 I decided to name Box (of Box.com), the App of the week.  Why you ask, good question!  Box.com is a great site for cloud storage.  When you sign up on-line, you get 10GB of free space.  What makes the Box app so awesome is that after you download it to your iPhone, iPad or both, your free space goes from a nice 10GB of free space to an incredible 50GB of free space.  That's right people 50GB!  That's something to smile about.  


Box has a super easy to use interface.  You can have your files listed separately, or in folders.  You can easily create new folders, or upload pictures and videos.  


You can download files for offline viewing, easily search your files, or access the other OneCloud apps (see the screen capture below).  


You can also easily e-mail or text a document.  


The easy to use interface, coupled with the incredible 50GB of free space could earn this app the App of the Month!

The last App of the week for January 2014 is an app geared for business/project users.  The app is BaseCamp.  


BaseCamp is an awesome tool for project teams.  If you've ever used Microsoft Project, you know how challenging it can be for the lay person.  BaseCamp is just the opposite, it's easy (not unlike your devices!).  BaseCamp lets you check on your project from virtually anywhere.  You can see the latest project updates, jump in on discussions and post your thoughts, view progress as team members complete to-do lists.  Everything in your project is available, helping you make important decisions where ever you may be!


So there they are, your January 2014 Apps of the week.  I'd love to hear from you, and get your choice for which App should be the App of the Month!  

My goal with the Apps of the week are to broaden your horizons as to what is available to you so you can be more productive with your iPhone and iPad.  I hope you enjoyed the weekly posts, as well as the more in-depth blog write up here.

Until next time (which will be very soon!)...best to you and your devices!


Friday, December 6, 2013

iOS 7 Tips Part II

So I hope you enjoyed my earlier blog with some great iOS 7 Tips...In case you didn't get enough the first time around, here are some more!

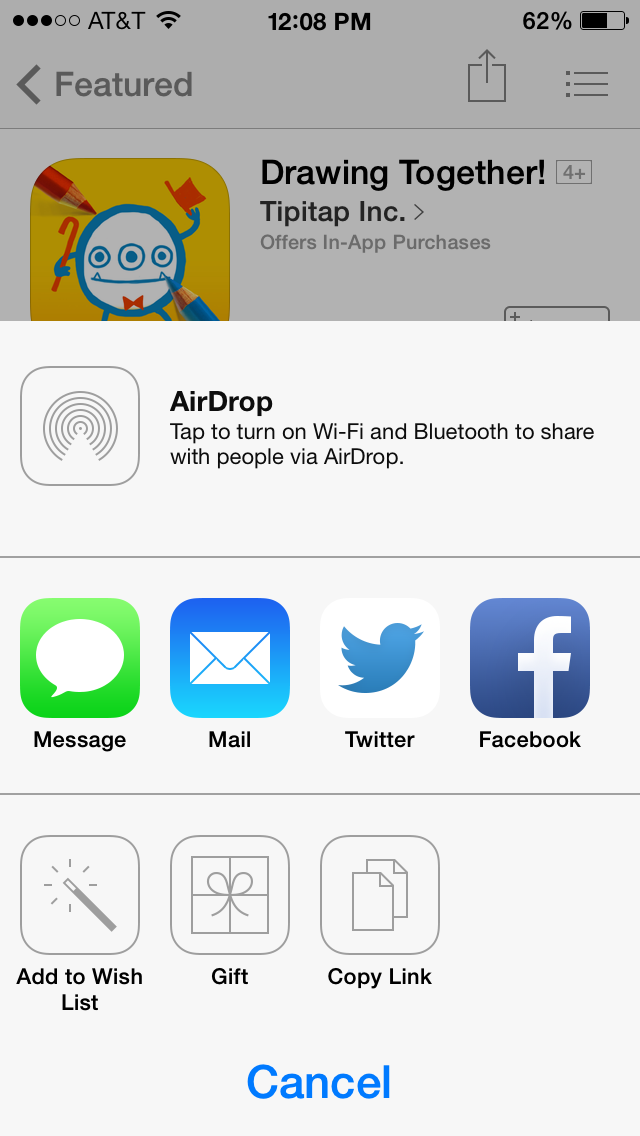
The first thing I'm going to toss out on this blog is an addition I've been looking for for quite some time.  Have you ever gone into the App store and wished there was a way to create a list of Apps you'd like to get, without having to either do a screen capture, or worse, jot the Apps down by hand!  Well, now there is an easy way, by creating a Wish List!  There is one caveat, it only works for paid apps...


Safari has gotten considerably better in iOS 7.  Beyond the cosmetic improvements, one great addition (for those with Twitter accounts), is the Shared Links @ tab, let searches your Twitter account and gathers pictures and articles in one place for easy reading!


Safari in iOS 7 also has a new way to view multiple pages, using tabs!  Now you can not only easily see what pages you have open in Safari, but easily close them by swiping to the left on the particular tab!


If you use Safari, and iCloud on your Mac (or PC!), you can share what you are viewing on your iOS device (as long as you have the Safari toggle in iCloud on your iOS device turned on as well).  In Safari on your iOS device, slide up from the bottom, to show the open tabs on the other devices you are using.  Very handy, and very cool as well...:).


You may or may not have used the Compass app in previous versions of iOS, but the App now has a great new feature, it's a compass, and a Level!  If you haven't checked it out yet, I recommend you do so...The level works, and is great for hanging pictures, or whatever else you need a level for!


Another great addition to iOS 7 is the FaceTime App for the iPhone.  Not sure what took Apple so long to give it it's own app on the iPhone, but its finally here!  With it, comes one of my favorite new features, FaceTime Audio!  Apple is going to great lengths to decrease your monthly Cellular bill, by giving you free texting (iMessage), and now free calling with FaceTime Audio!  That's right folks, and not only is it free, but it's amazingly clear, way more so that a traditional call, so if you haven't tried it, I highly recommend it!


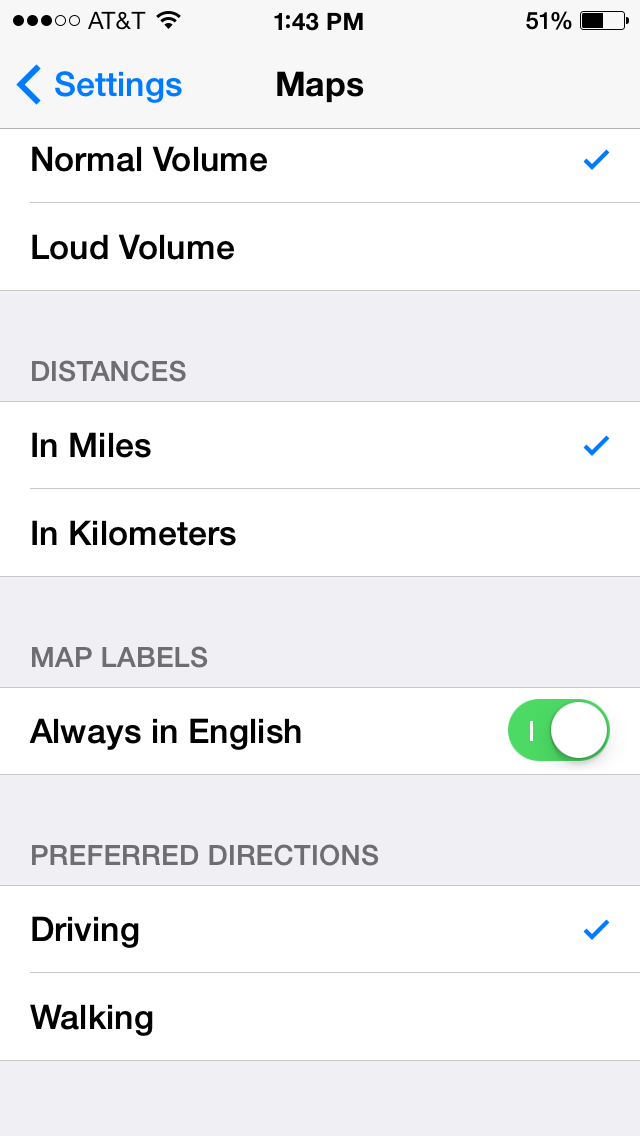
Maps in iOS 6 got more flack than all other iOS apps ever!  Thankfully, Apple did a nice job with Maps in iOS 7.  Many great new features, the one in particular that I'm going to point out here is the ability to have Maps give you either walking or driving directions.  Simply go to the Maps settings and set the default for whichever is best for you!


Another App thats gotten an overhaul in iOS 7 is Photos.  Now, your photo library is divided by date and location into Moments, Collections, and Years.  As more photos are added to those sections, the thumbnails get smaller.  To get a better idea of the pictures, simply long-press one, and move your finger around to view the others.


One of the great new additions to the App Store is a Kids section!  That's right, Apple has added (finally!) a section dedicated to kids only Apps!  The apps have three ranges:  5 and under, 6-8 and 9-11.  Parents now have an easy way to find age appropriate apps (and games) for their youngsters.


A cool new addition in Siri (of which there are many), is here ability to change settings for you.  For example, Siri can both make the screen darker, and brighter.  Check it out!


I decided to drop a second blog out this week because, quite frankly there are so many new features in iOS 7 I thought it be prudent to share more...look for a third and final blog on new features in the coming weeks...I hope these have helped, and if they have, share them with your friends, who should share it with their friends....etc...etc....etc...:).

Have an Awesome weekend!  

Until next time...best to you and your devices!


Thursday, November 7, 2013

MUST read for those of you purchasing a Cellular iPad Air and iPad Mini...

So I went through a rather painful experience with a customer yesterday that I hope those of you reading this blog, and purchasing a new Cellular version of either iPad can benefit from.  My customer purchased a new AT&T Cellular iPad Air from an Apple Store.   Should have been a seamless process.  Open the iPad, set it up, then set up the cellular connection with AT&T.  The first part was seamless.  However when we went to setup her cellular account, we found the SIM card included with the device, was not active.  Now that wouldn't have been so bad if all we had to do was call AT&T and have them activate it.  But that was NOT the case at all.  We called AT&T only to find out that we would have to either go to an AT&T store to obtain a working SIM card, or they could ship one to us.   The point of going to the Apple store is for convenience.  It is supposed to be a one stop shop, now to find out that for purposes of purchasing Cellular iPads that is NOT the case at all, and nowhere is this advertised by the way, is a bit disturbing!  Now, if you purchase a cellular iPad at the Apple Store, you have two choices, either go to the carrier store after and get an active SIM, or call the carrier and have them overnight one to you.  A ridiculous process!  So here's the rest of what we went through. Next, I spent over 30 minutes with AT&T, was sent to three different consultants, the last one, that goodness was very good, and was able to help us, and smartly had a new SIM shipped out overnight at no cost to the customer.  Thank you AT&T for that.   Also found out that if you sign up for a two year contract with you cellular iPad, AT&T will give you $100 dollars off your service.

So, lesson learned the hard way.  If you are going to be purchasing a Cellular version of the iPad Air or iPad Mini, your best bet is to do it, sadly at the carrier of your choice.  If you are purchasing the Wi-Fi only version, the Apple Store is still the place to go for that...then have me do the set up for you!

I hope this quick little blog helps you avoid what happened to my customer.  Because no one has time to waste, especially for something like this!

Until next time, best to you and your devices...

Wednesday, August 14, 2013

What to do if your iOS device (or even your Mac!) is lost or stolen…:(


We all love our iOS devices, for some of us, they have become a third hand, an extension of us!  We’ve grown accustomed  to having our iPhone in our pocket, or purse or simply in our hand, everywhere we go.  For some of us, it contains not only our contacts and calendar events, but our business notes, banking information, credit card info, Starbucks card, and a slew of other information I can run down before I even mention your pictures!  The point being, these tiny, wonderful little devices also carry around a shocking amount of personal information.

What do you do, if the unthinkable happens.  Your iPhone/iPad gets lost, or even worse stolen!  Hopefully, you’ve been following my blogs, and are backing your devices up regularly with iCloud!  Doing this will at least give you piece of mind that your data is backed up, as well as giving you the ability to either lock down your device (if it’s misplaced), or you can completely wipe the device clean if you know it’s been stolen and it’s not coming back to you…:(


Here’s how you protect yourself.  First, you’ll go to a computer, open a web browser, then navigate to www.icloud.com.


Next, you’ll log in with your iCloud account (usually it’s the AppleID you use for purchases, some of you may have a second AppleID for iCloud). 


Next, you’ll click the Find my Phone icon.  It’s not a well named icon, it should be titled “Find my device”, as it can show the location of all your iCloud connected Apple devices, as long as they are turned on.  


The next screen you come to will be a map that will pinpoint your device(s) if they are on.  If they are not turned on, they can’t be found. 


 In the event that they are off, and you fear your device is stolen, you’ll click the All Device button (top center of your screen), which will show a listing of your devices (both on and off). 


 If the device is off, click the device and you be taken to another screen.  Here you’ll have the option to Play a sound, Lock the device, or Erase the device.  Now for my purposes here, I’m not going to be able to graphically show you how to do this, because if I lock my MacBook Pro, I'm not going to be very happy with myself!  So, I’ll guide you through what to do next.  When you push Lock the Device, you’ll be prompted to add a code so whomever has the device, and tries to turn it on, will be unable.  And if they subsequently try to take the device to an Apple Store, or an Authorized Apple dealer, the minute a person from the store tries to turn it on, they will know the device is not in the hands of the rightful owner.  You’ll also be prompted to add a message and phone number, in the event that your device is lost and a kind soul actually cares enough to return it!  You can also choose the drastic, but content saving (as well as headache saving) method of Erasing the device of ALL content (every last thing!).  Again, if you’ve done your iCloud back-ups, as soon as you replace your device, you restore from your last iCloud back-up, and your headache will be over (though your wallet will be feeling it!).  

Hopefully you’ll never be in a situation that requires the services described in this blog.  But should you loose or have your device stolen, the content of this blog will at least be able to give you piece of mind that your content (which is really the most important thing here) is safe!