Monday, April 23, 2018

Getting the most out of Finder with these Six helpful tips and tricks.

Six helpful Tips for using the macOS Finder more efficiently and effectively


Whether you are new to the Mac, or have been using it for years, one of the best ways to be more productive with your Mac is to get more comfortable using Finder.  Out of the box, Finder is lacking in it’s easy of use, however with these six tips that I present below, you’ll find Finder far more useful and user friendly. 

Finder is the classic Mac application that's ever-present on your desktop, used to help you find and organize your documents, media (pictures, music and movies), as well as folders, and all other files. It's the smiling icon on your Dock, the only App that you can’t turn off or quit out of (did you know that?).


There are a number of awesome hidden features that exist within the Finder window. In this blog, I’ve highlighted six of my favorite Finder tips and tricks to help you work more efficiently with your files and folders. 

1. Quickly Adjust Column Widths

The Column view is my favorite ways of working with files, and here are two column adjustment tips to make it work better for you. 

If you open a new Finder window and the column width is too small to view the names of your files, double-click the bottom of the column divider and the width will automatically expand to fit the longest filename, so you can easily view your the files. 


Another useful trick is to hold down the Option () key when adjusting the column width manually (by click-dragging the divider). This adjusts all of the columns in the same window at the same time, and also sets the chosen size as the default column width for all Finder windows going forward. 


2. Set a Default Folder for a New Finder Window

Now, when I’m working with a client for the first time, I will set the default view to Recent.  You may wish to change the view and here’s how to do it.  If you often work with files in a specific folder, then it's worth setting it as the default folder that every new Finder window opens with automatically. 


Click Preferences in the Finder menu bar, and under the General tab you'll see a dropdown menu under "New Finder windows show:". Select one of the options in the list, or click Other... to choose a custom location. 

3. Customize the Toolbar

This is also one of the first things I do when either setting up a new Mac, or working with a client for the first time.  You can put so many more options at your fingertips when working with files and folders by adding more action buttons to your Finder window's toolbar. 


All you need to do is, right-click (or Control-click) the Finder window's toolbar and select Customize Toolbar.... You'll see a dropdown menu of buttons any of which you can drag up to the toolbar with your mouse cursor, as well a default set that you can drag up to replace any you've previously added. 


4. View multiple Finder locations within your Finder window. 


If you are familiar with viewing multiple websites within your Web browser, Finder has similar very useful functionality.  First, make sure you’ve enabled the Show tab bar option, within the View menu option.  This is a wonderfully easy and efficient way to move any file type to another location.

As you can see in the screen capture above, I’ve got three different views using the tabs.  The Pictures Folder, Music folder and Documents folder.


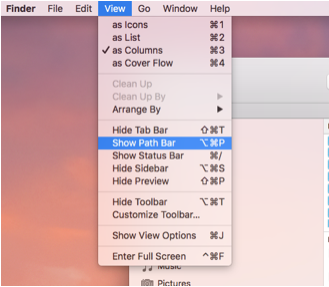
5. Reveal the File or Folder Path and show the Status Bar

The location of a folder or file may not be immediately obvious or important when viewed in a Finder window, so here are a few ways to find out. 

The easiest method is to enable the Show Path and Show Status Bar options.  Click the View menu option, right-click (or Control-click) the folder name and icon in the title bar. This will show you the full path in a dropdown menu, allowing you to quickly jump to any folder in the list. 


As you can see above, In the Finder Window above, The Music Favorite has been clicked on the left, then on the bottom of the window you see Macintosh HD > Users > Geoff > Music, revealing the location of the folder you’ve highlighted. 

Finally, and surprisingly turned off by default, the Finder's Status bar displays two pieces of information that will come in handy when organizing your files. 


In the Finder menu bar, select View -> Show Status Bar, and you'll be able to tell how many items are contained in the open folder, as well as the current disk's available storage space. 


6. Search Only the Current Folder

Last, but not least, the Search bar in your Finder window searches your entire system by default, but it doesn’t have to.  There’s an option in Finder's preferences that lets you automatically limit searches to the folder that's currently open. 

In the menu bar, click Finder -> Preferences and select the Advanced tab. In the dropdown menu under "When performing a search", select Search the Current Folder


Finder is my favorite and one of the most important tools, and can be yours too if you implement these great, easy Finder changes.  


I hope you enjoyed this blog, if so please share with other who can benefit from it!

Tuesday, January 17, 2017

AirPods...A 1 month review


After months of delay, Apple finally released the wireless/Bluetooth Air Pods in late December.  Thanks to my good friends at Apple, I was able to get my hands on them about a week after their release, even though I wasn't too sure if, or how much use I would put them through.  Initially, I was ambivalent to the wireless headphones.  In the eight plus years that I've been an iPhone user, I never really used the air buds that came with the device, short of to listen to music.  The Air Pods represented an opportunity, though.  That opportunity is to truly have your iPhone (or other smartphone) be hands free in the car and beyond.

The Air Pods come housed in a sleek white case, that doubles as a charging device for the Pods when you slide them in.  The case comes equipped with a lightning charger (same as all the new iOS devices) that you can plug in anywhere you'd plug in your iPhone or iPad.  The Air Pods connect to an iPhone 7 seamlessly (also connects very easily to any iPhone).  You simply open the case near your iPhone and the iPhone recognizes the new Air Pods and connects instantly.  It's really that easy.  On a side note, the Air Pods will work with any Bluetooth enabled smartphone or tablet device, not just those from Apple.  The Air Pods can also be connected to any Mac.

Once connected to your iPhone, you'll get a message similar to the one below on your iPhone.


The Air Pods are super ease to use, once placed in your ear, you'll hear a quick hum, letting you know they are connected and ready to go.  Then you simply double tap either bud (near the top of the bud) and Siri is enabled.  Then you give it commands like "call mom", or "text dad", or "I need directions to Whole Foods", without having to say "Hey Siri".  If you place a call, to end it, simply double tap one of the Air Pods and your call ends.  It literally couldn't be easier (and safer).  If you need to know how much charge is left in the Air Pods, you can simply place them in their case, leave it open near your iPhone and you'll get a window (like the one above) providing you with them amount of charge not only in the Air Pods, but also in the case.

The cost of other Bluetooth headphones range anywhere from $38, to well over $200.  The Air Pods come in towards the higher end price range, at $159.  After the first month, I am happy to say they are well worth the price.  

I hope this helps you if you are considering the Air Pods, and if you are on the fence, I would suggest getting them, you'll be happy you did.

Thanks for reading, and until next time, best to you and your devices!

Thursday, October 13, 2016

Wait iOS 10 does What?

Apple recently released iOS 10 to the masses.  For those whom change is, well challenging, the numerous changes in iOS 10 I'm sure have you longing for iOS 9.  As you all should have come accustomed to by now, change is one of the many constants that you should expect from Apple.  Here are some of the biggest complaints I've heard (to this point).  "I hate that there is a new way to unlock my iPhone!"  Next, "All the sudden my family is getting overage charges on our data, why?"  Finally, "Why did Apple change the way my email comes in??

I hear your pain, all valid arguments.  One of the reasons we love our devices is that we know how to use them.  When Apple, or some other developer decides to shake things up and tell us how to use our devices better, WTF?  Right?  Well, we can sit around and complain about the new features and functionality, or, we can adjust and learn the new ways of our devices.  I recommend the later!

Thankfully I have fixes for a few of these changes.

First there is no way to bring back the "Swipe to Open" feature.  You can however make the opening of your iPhone a little easier.  Here's what to do:  1.  Make sure you have enabled Touch ID (setting up 1 or more fingerprints to use as a Passcode).  2.  In Settings, go to General > Accessibility> Home Button > enable the Rest Finger to Open setting.  This will make opening your iPhone a bit less "painful."


Next, has anyone in your family been hit with crazy data overages since iOS 10 came out?  Here's why!  Somehow Apple sneaked a new setting into the "Agreement" we all have to agree to when we update.  That unknown agreement is in the Cellular setting of your iPhone and is called Wi-Fi Assist.  Here's what it does (and it doesn't assist your Wi-Fi!).  The setting is defaulted to On.  What it does is this.  When you are in a Wi-Fi environment, and the Wi-Fi is "weak", it flips you off of Wi-Fi and onto Cellular!  That is the assist!  It's a sneaky horrible feature needs to be turned off!  It should be called Carrier assist, as it does nothing but put money into the Carrier's pockets by taking you off of Wi-Fi.


Finally, Apple decided that when you have a chain of emails, your newest email should now end up on the bottom, instead of the top!  Frustrating, but at least there is a way to remedy this unnecessary situation.  Go to the Mail setting, slide down to Threading, and enable the Most Recent Message on Top setting.


This should help you "deal" with these frustrating new "features".  Hopefully you've found some of the great new features in Messages, Maps and Photos, useful.  As well as the new Widgets, which present data from your apps in a quick and useful way.

As always, thanks for reading, and please share with others people who will find this helpful.  Until next time, best to you and your devices!


Monday, October 3, 2016

New Siri Features for iOS 10, macOS Sierra and Apple TV.

For many of iPhone users, Siri has been nothing more than a nuisance since it's arrival in iOS 5, way back in 2011.  Perhaps it never understood what you were asking, perhaps you never understood how best to speak to it.  Whatever the reason most iPhone users have never really got the full benefit of Siri.  
I've witnessed Siri work and I've gotten quite a laugh when Siri doesn't understand what it's been asked.  The key to it's use though simple, is not easy.  It requires a good deal of inflection in your voice, and some patience.
Siri for iPhone and iPad
This past summer, Apple introduced a SiriKit SDK (system development kit) in iOS 10, which allows Siri to be integrated into third-party apps for the first time. What does that mean for you?  Well, with third-party app support, Siri can now do more than ever before. For Uber users, speak a command such as "Get me an Uber to Wrigley Field" or "Send John $100 with Square Cash" or "Call dad with Skype" are now all possible. Siri's new functionality is long over-due and a feature that makes the personal assistant much more useful in our everyday lives.
Siri's new integration is available for six different kinds of functions: ride booking, messaging, photo search, payments, VoIP calling (for apps like Skype and WhatsApp), and workouts. What this means for us, is that Siri can now send messages, book rides, search photo apps for videos and images, make and request payments, place calls in apps like Skype, and initiate workouts. If your car has Apple's  CarPlay, there's also specific functions for accessing climate controls as well as adjusting radio settings.  
For you LinkedIn users, you'll now be able to use Siri to send a message by simply saying "Hey Siri, send a message to Bill that says, Thanks for the great referral today."
Another great new feature gives You the ability to ask Siri to locate pictures from a trip by saying, "Hey Siri, show me pictures from Italy in 2016."
                                       Siri For macOS Sierra
Siri is now also available on your Mac with the update to macOS Sierra.  After you've upgraded your Mac, Siri will live on the Menu bar, between Spotlight Search and Notifications.  

Similar to how you use Siri on an iPhone or iPad, you can now use Siri for tasks like searching for movie times, calling and messaging people, even toggling settings like Bluetooth and Wi-Fi on and off!  One of my favorite features in Siri for Mac is being able to search for files using Siri by saying "Show me the document I was working on last night" or "Find photos I took last month at Wrigley Field."  You can even use Siri to search for information and pin the search right into a document you are currently working on!  
Siri for Apple TV
Finally, I'd like to discuss Siri for the Apple TV (4th Generation).  If you've purchased a new Apple TV (one with 32GB or 64GB of Storage), it now comes with Siri support that is accessed using the brand new remote control.  


  Apple has done a great job integrating its virtual assistant into the Apple TV.  You can use Siri for things as mundane as asking Siri to play your most recent iTunes playlist, to asking Siri to search for movies staring Marlon Brando.  If you are not sure what the source for a movie or TV show is, Netflix, Hulu, HBO Now, Showtime, you can simply ask Siri to search for a title like "I want to watch Field of Dreams", and Siri will show you the Apps that have that particular movie and you can choose the source to play it!  If you are not sure what you'd like to watch, say something like this:  "Show me something Funny", or "Show me the new releases", and Siri will create a list of Comedies and new releases for you to choose from.  And hows this for cool?  You can say things like "Turn on Closed Captioning", or "Fast Forward 3 minutes" and Siri can do those for you as well!  Siri can search YouTube for videos, search the App Store for games, and if you have HomeKit running through your Apple TV, you can tell Siri to set the home temperature by saying "Set home temperature to 70 degrees".
Wow, Siri sure has come a long way since it's inception.  Yes it's not perfect, and yes it can and still is getting better, but Apple has given you a wonderful tool in Siri, and I highly recommend you take advantage of all it has to offer.  
Those are just a few of the ways that Siri can assist you.  I hope you found this blog helpful, if so, please share.  Until next time, best to you and your devices!


Thursday, September 1, 2016

iOS 10 New Lock Screen Functionality

There are some tremendously useful, cool and fun new changes coming soon in iOS 10.  In this blog, I'm going to cover some great new features coming to the Lock Screen.  

In iOS 10, the Lock Screen has been given a major overhaul, with the removal of the iconic "Slide to Unlock" feature, a new Widgets side panel, a redesigned Control Center, as well as new and revamped notifications.  The Lock screen also has a crisp new look and feel, as notifications no longer dim the wallpaper. With the availability of Touch ID in the iPhone 6s and 6s Plus, many users were skipping their Lock screens and ended up missing their notifications, so Apple happily implemented some changes to help prevent you from missing them. 

A new feature called "Raise to Wake" activates the Lock screen of the iPhone 6s, 6s Plus, and SE when picked up, displaying all information on the screen without the need to put a finger on the Touch ID home button.

The famous "Slide to Unlock," the feature that let you swipe right to access the passcode screen, has happily been eliminated. The Lock screen now informs users to "Press home to unlock" on a device that has yet to be unlocked with a finger registered to Touch ID or "Press home to open" on a device that has been unlocked but not opened to the Home screen.

On pre-iOS 10 devices, Touch ID used to simultaneously unlock a device and open it to the Home screen (when a finger was placed on the Touch ID button), but now a physical press is required as an extra step. This way, your notifications can be read in full before a device is unlocked, preventing them from being missed.  

Apple has replaced the old "Slide to Unlock" screen is a new Widgets panel, activated with a simple right swipe. The Widgets panel displays all of the widgets that were previously available in the Today section of the Notification Center. iOS 10 brings some welcome "new" built-in widgets, including Mail, Maps (Destination, Nearby, and Transit), favorite contacts, Music, Notes, and Photos (Memories).  Widgets are not available in the Notification Center when on the Home screen, but when in an app and accessing the Notification Center, widgets continue to be available through a right swipe on the screen.  My favorite new feature on the lock screen is the new Left swipe, which brings up the camera, making it so much simpler to quickly take a photo.

Another great feature has Apple adding 3D touch capabilities to Notifications on the iPhone 6s and 6s Plus (and the coming 7 and 7Plus), allowing you to do more without having to leaving the Lock screen, like viewing photos and videos and responding to incoming text Messages. Notifications have also been streamlined across watchOS, tvOS, and iOS. 

The Notification Center no longer has the "Today" view, now offering up a simple list of all incoming Notifications and a search bar for quick access to Spotlight search. 3D Touch in the Notification Center now offers up an option to clear all notifications at once, a nice change for faster management of your notifications.

Well those are some of the great new features coming soon to the Lock screen in iOS 10.  Thanks for reading, and come back next week for some additional great iOS 10 features.

Until next time, best to you and your devices!


Wednesday, June 15, 2016

Coming soon in iOS 10

With every June, comes the Apple WWDC (World Wide Developer Conference), which brings us news of the great things to come for all our Apple devices.  This past Monday, the WWDC kicked off with a 2 hour Keynote presentation about all the cool new features coming for our iPhones, Macs, Apple Watches and iPads.  Today I'm going to focus on some great new features coming this fall in iOS 10.

For starters, theres some great new functionality coming to SIRI.  You'll be able to use SIRI to book a ride with your favorite ride service, like Uber or Lyft.  You'll be able to use SIRI to search through your photos, make payments through apps like Cash, PayPal and Square.  You'll be able to have SIRI check your calendar availability and it will even support multi-lingual questions!  And that's just a small list of new Siri features coming later this fall.

One of our favorite things to do with our iPhone is take amazing pictures and videos.   For iOS 10, Apple is making the Photos App better and easier to use!  Some of the great new features include facial recognition, object and scene recognition.  Photos will be able to sort your pictures by trips, date and even the people who took trips with you, a super cool new feature!

Also updated for iOS 10 is Maps.  Maps has been totally rewritten and now provides better navigation, with the ability to zoom in and zoom out for traffic.  Maps will be able to proactively provide you with better and alternative routes if the one you are taking has say an accident, or tons of traffic.  How about being able to book a ride with Uber directly from Maps?  Well that feature has been added as well, to allow you to do so much more without ever leaving the Maps app.

Apple Music has also been redesigned with some subtle changes, starting with a fresh new design to show your Library and the items in it; Playlists, Artists, Albums, etc.  I will focus more on these design changes in a blog later this summer, but you'll love the new look and feel of the Music App.

The Phone app has a handful of great new features, the biggest being you can get your voicemails translated to text, so you don't have to press the play button to listen, a great addition to the Phone app.

The biggest update from an App perspective comes to Messages.  I'm going to point out some of the highlights, but will also create a blog later this summer dedicated solely to Messages.  To start, for those of us that can't see so well, you'll get emojis that are 3X larger!  You'll also be able to easily add emojis to your text, once you've typed, tap the emoji button, and words in your text that can be replaced by emojis will be highlighted.  Next you tap those words and they'll get replaced by an emoji!  It's super cool and will make more sense when you see it.  You'll be able to add cool new effects to emojis, created invisible ink text that the receiver can swipe to show what you've sent them, that's an awesome new feature.  You'll be able to hand write texts, create full screen texts and more.  Those are just some of the great new features coming.

I hope you are excited, look for more blogs to come on the new macOS features, watchOS features and tvOS features.

Thursday, March 24, 2016

The brilliance of iCloud Photo Sharing

How often do you find yourself running low on space on your iPhone or iPad?  When that happens, do you know what to do?  Do you end up deleting apps you don't frequently use, or even worse, do you end up deleting things you do often use, but have no choice because you are constantly running out of space thanks to the great pictures and video that your new iPhone/iPad take?    Fear not, you are not alone!  Ok, you say, what are my options outside of buying a device with more internal storage?  You have options, or at least AN option.  That option is a great one, and believe it or not, it's a free option at that!  

A few years back, Apple quietly introduced something called iCloud Photo Sharing.  Perhaps you've experienced this (if you are a client of mine, you most certainly have).    On your iPhone or iPad, you get a notification that someone has invited you to their shared photo stream.  If you are in the know, you quickly accept the invitation to view the photos that have been shared with you.  No emailing, texting involved, someone simply creating a shared stream, and inviting you to join and view their photos (and even videos).  Wait you say.  Sharing pictures and videos without emailing or texting (or using Dropbox, or Shutterfly)?  Sound to good to be true?  Well it is!  Apple has given you free space in the cloud to share, are you ready for this?  Up to 500,000 pictures and videos, and wait, it gets better, FOR FREE!  Whoaaaaaaaaaa.  This can't be...Well yes it can be, and it is!  Apple has provided free space for you to create 100 shared streams (or albums), each containing up to 5000 pictures and or videos (the videos can be up to 4:59 in length, anything over will not get uploaded).  If you calculate this folks, Apple has given you space for 500,000 pictures and or videos to store and share in iCloud, FOR FREE!  I can't stress the last part enough, IT'S TOTALLY FREE!  

Why haven't you heard about this?  I wish I knew.  Short of the fact that it's never been advertised, I quietly found out about it and decided it should be shared with the masses.  

So how does one go about creating a shared stream?  It's quite easy.
From your iOS device, go to Settings > iCloud > Photos > enable iCloud Photo Sharing.  


Next, head to the Photos App.  You can choose pictures either from an Album, or the Photos tab (they are the same pics, under the Photos tab, they are sorted).  Click Select (top right), then choose your photos and or videos (remember, if you want to upload a video, it MUST be under 5 minutes in length).  This next part is crucial to remember.  You can upload up to 1000 pictures an hour, and no more than 10,000 a day.  If you go over 1000 in an hour, the uploads simply stop.  So please remember to keep that in mind.  Ok, now that you've selected your pictures and videos, tap the Do-More icon (on your iPad it's on the top left, on your iPhone it's on the bottom left, it looks like a square with an arrow out of the top).   Next, tap iCloud Photo Sharing,


The next few steps are critical.  If you have either never created a shared stream, or never been invited to a shared stream, when you do create one, you simply give that stream a name.  However if you've created or been invited and joined one, the next step is important.  What happens is that when you click iCloud Photo sharing, it wants to put those newly chosen pictures into the last Shared Album you either created or were invited to.  So you MUST then tap where it says Shared Album.  


From here you can either click the + to create a New Shared Album,  or add the pictures you've recently selected to an existing Shared Album.    If you choose to create a New Shared Album, you'll give it a name, then tap next.  


Here you have the option to share your newly created stream with other Apple device users, or not.  If you choose not to share, the stream is still shared, with any devices you own.  

So let's review a few things here:  Apple has given you free space in the iCloud for 500,000 pictures!  You can create 100 shared streams, each containing 5000 pictures and videos (videos can be up to 4:59 in length).  Crazy.  What's even better is that even though you are allowed to only create 100 shared streams, there is no limit to how many streams your friends and family can share with you.  If you have 5 people in your immediate family, each of you can have and share 100 shared streams with 5,000 pictures and videos.  That's more pictures and videos than you'll ever be able to view!  Let's not forget your friends with Apple devices, so theoretically there's endless free space for pics and videos in iCloud for you, your friends and your family!

So what are you waiting for?  Start sharing your pictures with friends, family and loved ones around the globe!  

I hope you found this blog useful, if so, please share with others who may find it helpful.  Come back shortly for part II.